A Compression Molded Remote Controller
Services Used
Compression Molding
Material Used
Mold Tool: #50 Spring Steel
Compression Molding: Silicone Rubber, Shore A hardness 30
Tooling Lead Time
13 Days
Order Volume
1000 pcs.
The Customer and The Idea
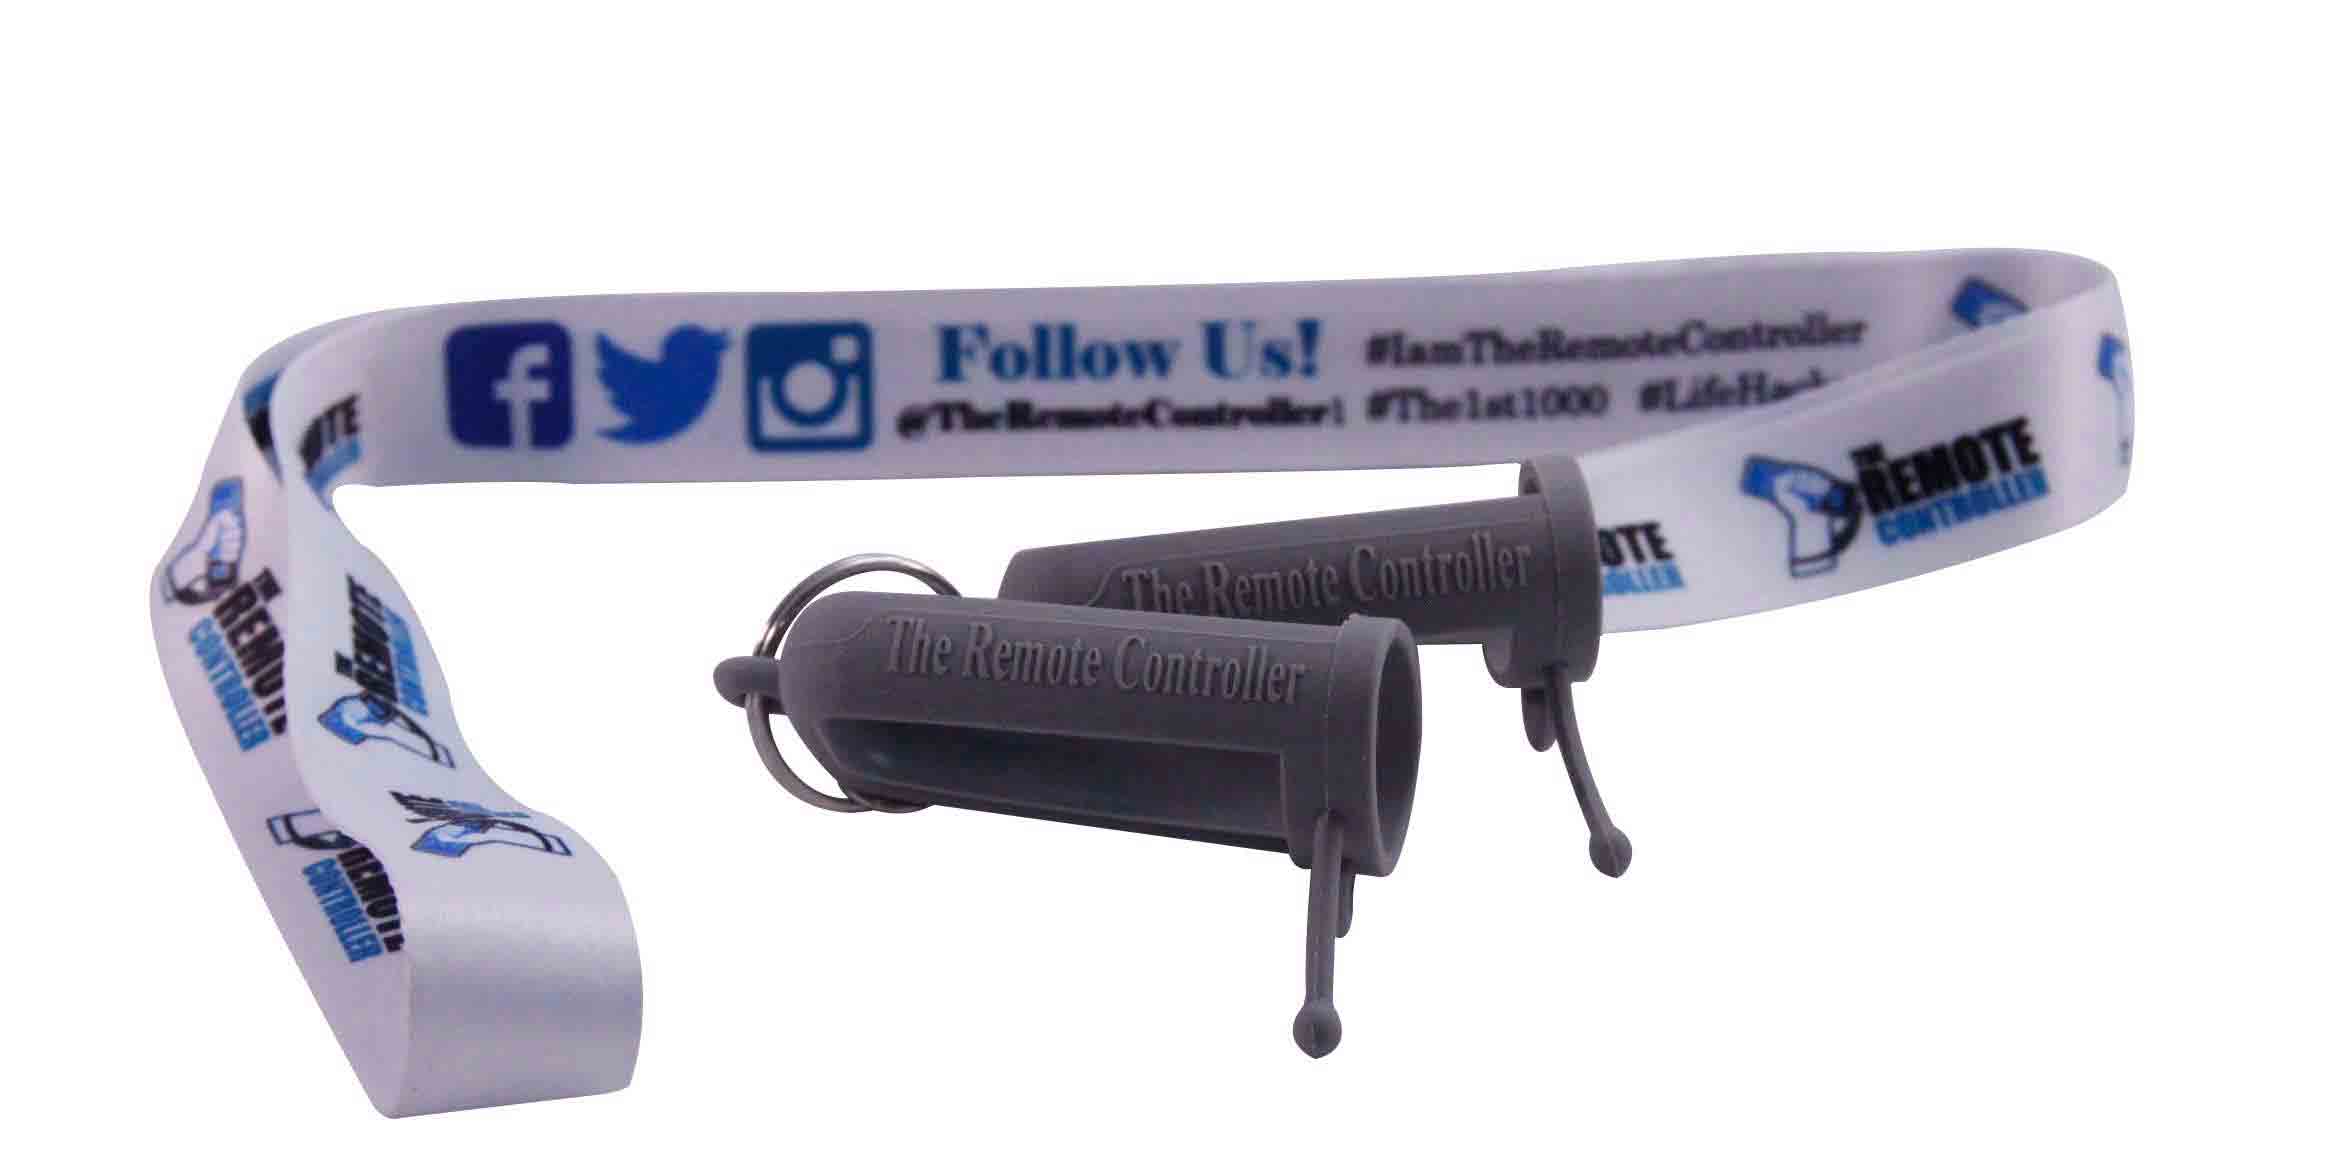
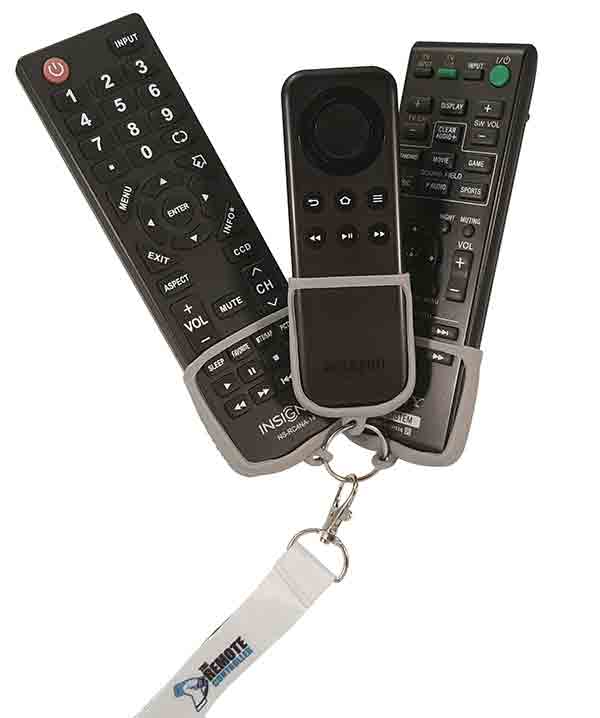
The team at Willett Design Group approached us to help them create their new idea. The idea was The Remote Controller, an innovative organizing solution to keep your remote controllers in one place. It’s a universal rubber attachment that fits on all shapes and sizes of remote controls. Connect the many controllers in your life for your TV, Netflix, Blu-ray and more on one convenient lanyard and never lose a remote again!
Developing a new idea and getting it to market will always come with a challenge or two. Let’s look at the Willett Design Group’s experience to learn the process for bringing ideas to life.
From Sketch to CAD file
A rough sketch is a great place to start for any invention. If you think the idea is a winner on paper, then the next step is to move from a drawing to a CAD file so it can be made into a physical prototype. The team at Willett Design Group had their 2D and 3D CAD files ready so the next step was to find a manufacturing partner.
Teaming Up With Michigan CNC Machining Parts, Inc.
Having a manufacturing partner you trust is important. The more flexible they are and the more willing they are to share knowledge and teach you how to improve your design for manufacturing the better. This will save you a lot of stress in the long term. If you choose to find a supplier in China here are some tips to ensure they are environmentally responsible. The team at Willett Design Group reached out to us here at Michigan CNC Machining Parts, Inc. to inquire about our available services.
Make a Prototype
When preparing to make a prototype there are a range of different processes you can use. Vacuum casting and 3D printing are great alternatives for plastic injection molding and CNC machining when creating your prototype since they avoid costly tooling investment, therefore you can make small quantities for cheap.
The team at Willett Design Group chose to make their prototype using 3D printing since it’s fast and flexible. It’s also an excellent, low-cost way to test the three “F”s: Form, Fit and Function.
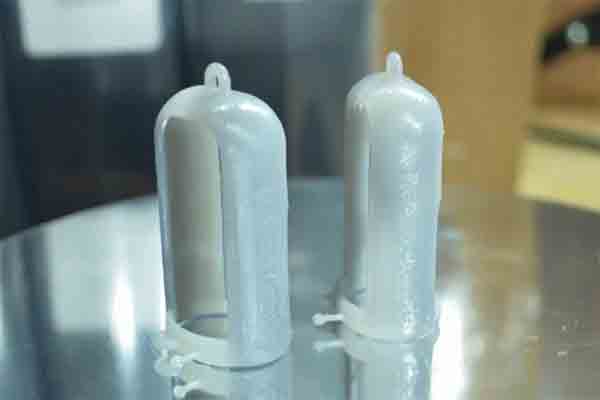
First prototypes made using 3D SLA printing
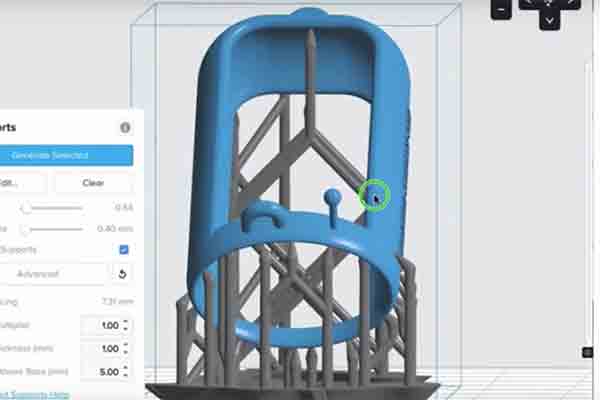
3D printing requires the use of scaffolding to support the part during the build.
Choose The Right Process For Manufacturing
Next, Willet Design had to choose the right manufacturing process. An elastomer rubber sleeve like this can be made with vacuum casting or compression molding.
They chose compression molding for low-volume manufacturing. It required a larger initial investment, but multiple cavities will let them produce many parts quickly and efficiently. This is a great way to provide an immediate revenue stream to recoup costs and grow a business organically.
Design For Manufacturing
Our engineers provide customers with a design for manufacturing review before production. This is important to ensure the designs are optimized for the manufacturing. Our main feedback for the team at Willett Design Group included the following:
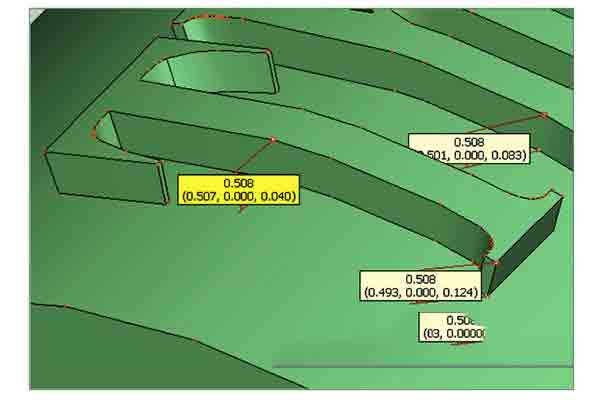
Embossed lettering detail
Decrease the height of the embossed lettering, to allow the part to be removed from the mold tool without damage. Deeply recessed lettering in soft material will stick too much to the tool walls, even with a draft angle.
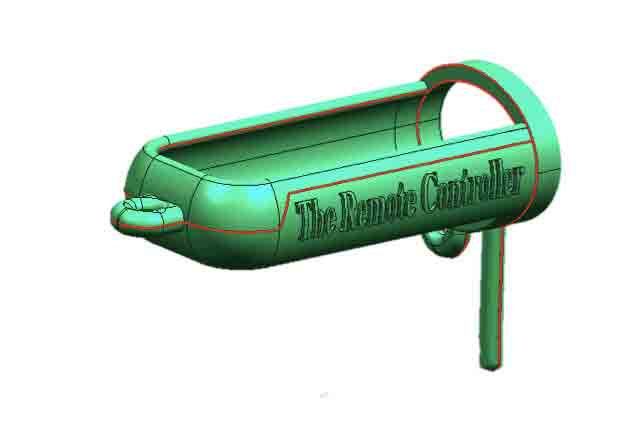
Parting line detail
Relocate the parting line of the mold so that it would form a natural design feature around the circumference of the shell while highlighting the product name.
Star’s knowledge about manufacturing is invaluable. They know what they are doing and I listened to every bit of advice they gave me. This type of guidance is vital to people who don’t know how intricate this process really is.
Compression Molding For Low-Volume Production
Compression molding uses two clamshell-type, “open flash” molds. Within the cavity of these two molds, an insert is placed to form the final shape. The green color on the tool is a protective oil that keeps the tool from rusting – allowing it to be stored for further production runs down the line.
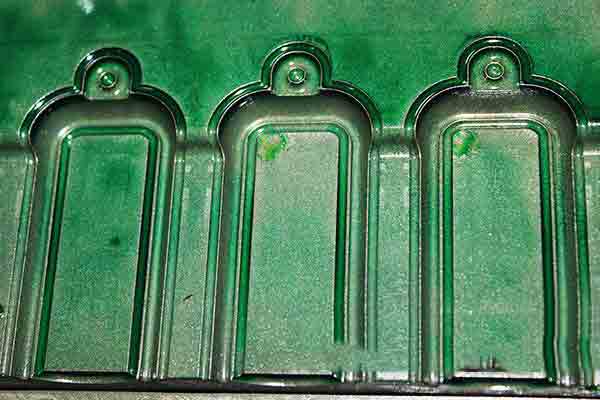
Cavity, mold A
A sheet of thermosetting silicone rubber was placed in the cavity of each mold tool. This sheet of raw material comes pre-mixed but is not yet fully cured. It will only cure under the heat and pressure of compression, about 300° C for three minutes.
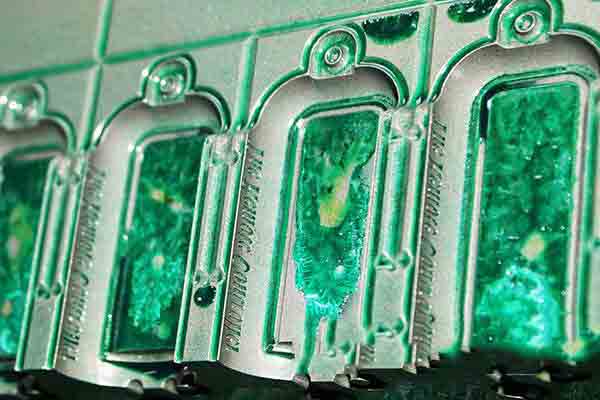
Cavity, mold B
The embossed lettering has been CNC machined into the cavity wall. Recessed letters here will become raised lettering on the finished part. It’s important that they not be too deep or they will stick in the mold.

Cavity with installed inserts
During compression, the two halves of the mold, with the inserts between them, will be held together under several tons of pressure. Excess material or “flash” will be squeezed out of the cavity to form a very thin strip around the parting line. This flash can later easily be peeled off by hand.
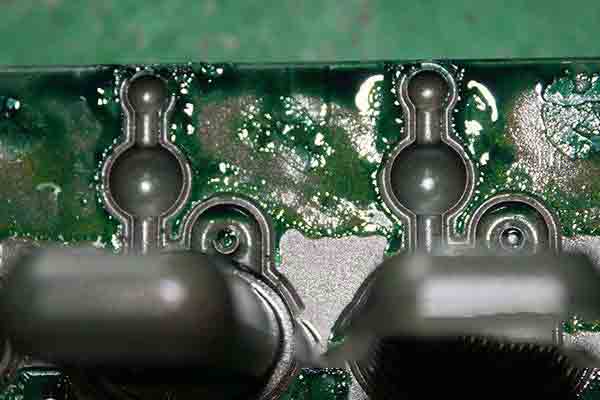
Detail of the open flash groove
The grooves outlining the part’s profile are troughs where the excess material will be pressed out to become flash.
Testing The First Samples
We always do a thorough QC inspection and test of the first set of sample parts to make sure everything came out right.
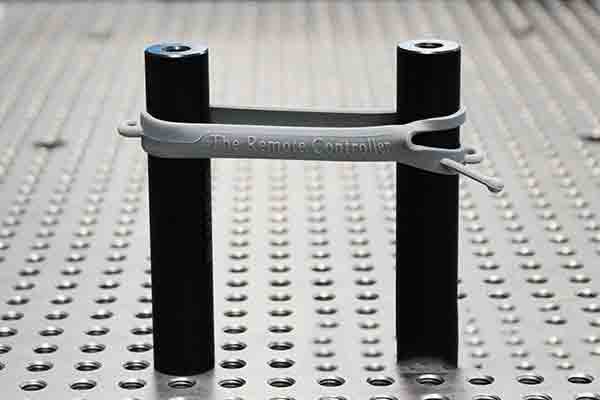
Stretch test
One of the first tests was to confirm the stretchiness of the rubber, since the remote controller needs to be flexible enough to fit every size and shape of device without breaking. We performed pull and twisting tests and everything seemed fine.
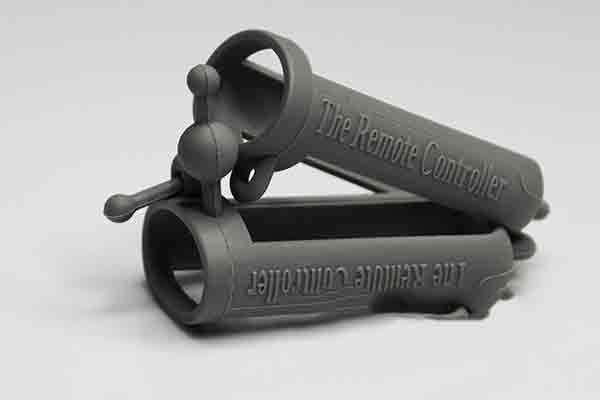
Finished parts
But during testing the client decided to modify the design of the stalk. We modified the tool and made a new set of samples within a few days of receiving the client’s revised drawings. A larger ball was added for better grip and holding power, and we think it also adds a little flair!
The Finished Remote Controller
The Remote Controller is now ready to go to work at theremotecontroller.net. From great idea to finished product in just a few months. We can do the same for you when you upload your CAD files for a free quotation and project review!
